
Monday, December 20, 2010
Project: Get Blogger to Go WYSIWYG
Crate & Barrel DIY Inspiration Bonanza

Thursday, December 16, 2010
Project: Work Holiday Party Outfit
If you're unfamiliar with this blog and her very interactive Facebook page, shame on you! I'm just kidding. You're just really missing out on a great resource for work-life and personal-life outfit inspiration. It's hard to get motivated to look nice at 7am every morning, and J gives you a head start to getting it right! Well...at least I HOPE I'm getting it right. ;)
Anyway, so after getting some advice from J, I came up with this inspired outfit. I figured the skirt was great for our San Diego weather (haha on me. It's raining today); the sweater (which I DIY'd last year from this Glamourai post) was a holiday grass green that the picture doesn't show; and my borrowed hat will make party time oh so jolly. (Can you feel my holiday spirit?) The skirt has a silk stripe down the middle, the outfit is comfy for the long day, and the shoes are accessorized just enough to make me happy. Care to share any holiday outfit mishaps or magical moments?
 Picture courtesy of me. Please excuse the blurriness...it's from my Skype camera, which is the only thing that would work at work. Also, don't you just love how I'm posing with my bike? ;) The only other option would be to throw it in the hallway and just ask my coworkers to watch it while I take some photos for my blog. Oh, I'd love to see how THAT goes over. Incognito it is!
Wednesday, December 15, 2010
Project: Organize My DIY Life!
I am so unbelievably overwhelmed right now with the amount of projects that I want to start. With Christmas coming at me like a freight train and very little presents to show for it, I'm not sure how to manage my desires and reality. Ay chi mama!
Since my parents are coming into town Christmas Eve, I need to have their presents ready and wrapped ASAP. And my sister and her family (Lou and the baby girls) should have their presents mailed before Christmas so they can have them to open. That needs to be done BEFORE my parents stuff. Ahh, I just don't know where to start!
So in true family fashion, I will just pretend like I don't have any problems and avoid thinking about Christmas presents almost entirely...until it's so dire that I have to get them all at once. It's a family thing :)
In the meantime, I'm crushing on a few DIY projects and a few things that I think I can DIY:
- Ribbon Necklace by collegefashion.net


- Carrot Cake Cupcakes by Hungry-Girl.com

- Snow Drift Candle Holders by Living with Lindsay

- Multi-Chain and Ribbon Necklace by She's Crafty

- Ribbon Bangle from American Eagle (I think a DIY would be super easy to make this guy.)
- "JOY" Bunting like this one from Joyful Joyful's Etsy shop.

- Fluffy Earmuffs by Mightymannie (I hope to make these for my mom with the leftovers from my stocking project that I STILL haven't done.)
And of course all of my holiday inspiration items. Man, what I wouldn't do to have crafting be my full-time job. Any suggestions on how to get organized during the Christmas season?
Photos courtesy of collegefashion.net, hungry-girl.com, livingwithlindsay.com, missonmimedia.com, and Joyful Joyful.
Monday, December 13, 2010
December in San Diego

Happy December!
Thursday, December 9, 2010
Project: Puff Ball Garland DIY
1. Choose your color scheme for the garland. I went with red, white, and black although I was looking for gray. Justin, it seems, would have been just as happy with the traditional red and green, but I wanted something a little different. You'll need different sized and colored puff balls, needle and thread, and scissors. That's it!
 2. While watching holiday movie (this is just a suggestion ;) ), play around with the sequence of the puff balls until you've decided on a pattern you like. I think I prefer the one on the top, but was afraid I wouldn't have enough of the red and white balls...turns out, they shorted me some black balls.
 3. Cut a piece of thread as long as you think you can handle it. I ended up cutting about four 3/4 yard-long pieces once all was said and done, although I cut each piece as need be. Tie a knot at the end of your thread. String the balls on in your pre-selected order trying to get the thread as close to the middle of the puff ball as you can. (You can feel that it's a little harder to pierce the exact center of the puff ball since it's much more dense in that area. Try to get the needle through there if you can; you don't want your balls falling off!) Don't force the balls on top of each other. They'll squish together if you push too hard, and you don't want crowded or scrunched balls.
 4. Once you've gotten to where you have about three or four inches of thread remaining, tie a knot as close to the end of your last puff ball as you can without pushing the balls back on top of each other. Cut your next piece of thread and tie it on as best as you can. I ended up sewing my new thread through the knot on the end of the first string and then tying a new knot on top of the old one to make sure they're connected.
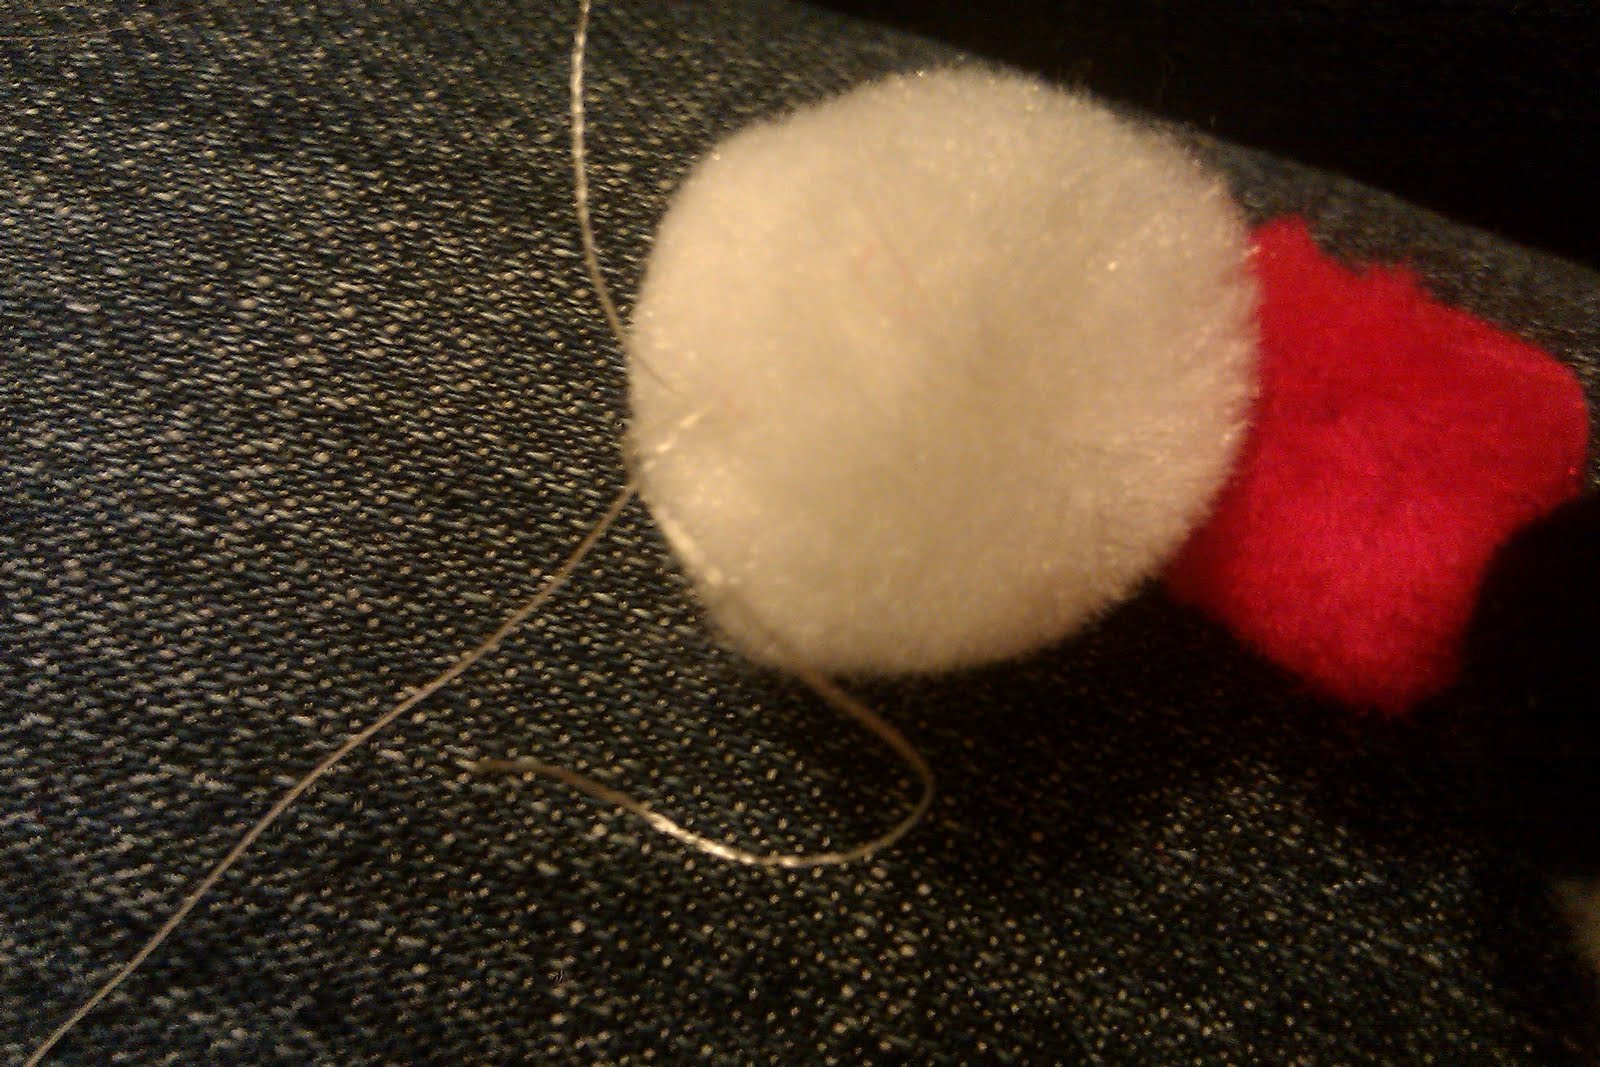 5. Continue on your merry way until all your balls have been used. Tie off the last string as in step four. Trim the loose ends and WHA-la!
 I have to say, I was really pleasantly surprised with how easy it was to make this and how nice my ball garland looks dangling on my rod. Justin said "it could even work year round," so there's always that ;)
This post inspired by AC/DC's "Big Balls."
Tuesday, December 7, 2010
Project: Christmas Door Decor, Stage 1
The outside of my front door is adorned with a borrowed faux pine wreath. I didn't show it here, but will definitely add it in my exterior shots. On the inside of the front door, I hung a faux berry and twig wreath that I picked up at Pier 1 after the holiday last year. I've been waiting all year to use this lady! Home Depot has gold and silver-finished hooks for wreaths for under $2 a piece. I snagged two for both sides of my door. Then I added little berry twigs to the top edges of my frames. The little berries are from a centerpiece I disassembled last year, but I'm sure you can cut up one twig from Michael's if you'd like. (I really think it's the small things like this that make the holiday really sparkle! And my friend Suzie already took note, so they must be working as a nice "welcome" and "see you soon" symbols for the entryway.)

 Here's my shining glory for the time being: the dining room! I used some ideas from Bower Power, but made it my own with what I already owned. The table has my black pashmina (I may switch this out for my burlap table runner for a slightly less Asian feel), red linen napkins, Christmas mugs my mom gave Justin and I last year, a plastic star bowl from Justin's grandma (also from last year) filled with even MORE ornaments (hope we have something left for the tree!), tea light holders from my friend Nissa's wedding two years ago wrapped in twine, sushi plates my friend Annie left behind in her move back East, red champagne chiller (from Justin's old house), reindeer wine stopper from Christmas last year (thanks to Uncle Lorenzo!), and the mouse and cheese salt and pepper shakers to be a little cheeky. Wow, please excuse the run-on sentence or massive cataloguing. Whatever you'd like to call it, but I thought it would be helpful to give a full run through. Besides, that has really helped me see how much I use from gifts/holiday sales/past events. I made out like a BANDIT last year, eh?!
 What do you guys think? The dining room table is really the easiest thing to change for the holidays. Start with your basics--plates, silverware, glasses--and then keep layering holiday-colored decor until you're happy with what you've got.
 Monday, December 6, 2010
Eddie Ross' Tips for Decorating Your Entryway for the Holidays
Thursday, December 2, 2010
Epic Fail
Back to life, back to reality.
Man, I hate when I miss an opportunity for a 90s throwback reference jam. Oh well, maybe next time ;)
You're welcome for getting that song stuck in your head if you're familiar with the greatness that was 90s music.
Wednesday, December 1, 2010
Christmas Inspiration
The time has finally come! It's finally socially acceptable to decorate my house inside and out with holiday decor ;) I probably would have started last week if I was feeling up to it, but the nasty East Coast weather got me (my brother-in-law, my dad, my niece, etc. etc.) sick.
I'd like to do have a gray and red theme throughout the house, but Christmas is such a traditional holiday that I've already gathered a ton of holiday decor that I would feel bad not using at least some of it (think a little country with bright greens and reds).
So, I might have to focus my gray/red efforts on the table-scape. Either way, here are a few of my favorite things that are inspiring me this season:
Scandinavian-inspired Star Garland by creaturecomfortsblog (link for DIY)

Christmas Under the Stars for Pier 1 by Bower Power

Ivory Knit Stocking With Faux Fur Trim From Pier 1 catalogue (hoping to have a DIY with my friend Michelle for these soon!)


What are you all doing for your holiday decor this year? Spicing things up with something new or keeping with tradition?
Photos courtesy of creaturecomfortsblog, Bower Power, Pier 1, Bower Power, Better Homes and Gardens.
Monday, November 29, 2010
Returning to Life
Wednesday, November 17, 2010
Plans for a Thanksgiving Table-scape Even Martha Would Love
Since I'm flying in from San Diego this Friday, I thought I'd start thinking about a few things that we could whip up really quickly to make a beautiful, but easy table. And since I have a few things in my decoration repertoire already, I thought I'd gather some stuff while I"m packing tonight (if I can remember).
Here are the things I already have and will be bringing with me from SD:
- twine
- bouquet of fake fall leaves
- bag of ribbons
- tissue paper
- plane paper bag
- khaki table runner
Things I will not be bringing due to size and fragility or just ridiculousness of the prospect of traveling that far with it:
- glass hurricane and jars
- silk leaf place mats
- candles
- pumpkins haha
- paint and/or glitter
- hot glue gun
My plan was if she's really serious about this table-scape, then when I get there, we can always get some fresh fall fruit like grapes or pears to brighten up the look. Or maybe good ol' Connecticut will have some pine cones or acorns on the ground ready for the taking! Plus, I'm sure she has a few bowls or vases that will work. The women isn't incompetent; she's just taking care of twins and doesn't have the time to plan the dinner AND decorate. Plus, I think she's being nice to me since she knows I like this kind of stuff ;)
Monday, November 15, 2010
Lace Epaulette DIY

 I started with some left-over lace and black felt from two previous DIY projects (an earring holder and the batty napkin rings).
 Once I got the rectangle cut out, I folded the felt in half and chopped off the edges of just the top side. This gave me the perfect epaulette shape. Perrrrfect (sorry, I'm a bigger dork tonight than normal). Now that I had one felt shape ready to go, I merely just used it as a pattern to trace on another scrap of felt. Now, I'm set with one epaulette for each shoulder.
  The best way I figured to make this work was to just place each piece of felt onto the lace and eye about a quarter-inch boarder around the edge. One thing that I found out was that even though the bottom of my felt was lined up with the bottom of the lace, this didn't necessarily mean that the pattern on the lace was straight. So, take my advise to make sure that if your lace has a pattern, you match THAT and not the edges. (This will save you the headache of trying to match up the pattern with very little excess to work with. Also, I might recommend more excess lace around the edge. I was on the verge of too little lace, which made it that much scarier to work with the hot glue.)
 Once you have the felt lined up with the pattern on the lace, put a thin bead of glue around the edge of one side of the felt. Fold over the lace and secure into the glue. I used a Pepsi bottle cap as a makeshift thimble to push the lace to further ensure that I wouldn't burn my fingertip. Paranoid, I know. I chose not to work around the epaulette, but instead glued one side and then it's opposite side. This helped to keep the lace from moving around and to make sure there was no excess lace bubbled once all edges had been glued in place.
 The result:
 I secured them on the shoulders of my cardi with one pin under each epaulette. I played around a bit with the placement, deciding to put them a bit further on the front instead of the seams of my shoulders. This helped them stay flat, which also sort of held them in place a bit since the bumpy, dried glue grabbed the pelt of my semi-fuzzy sweater. Next time I might use two pins to keep them in place better. I also might try them on the edges of a jacket pocket (maybe aforementioned army-green jacket?). Anyway, what do you think? It's a bit fashion forward for my usual style, but I think it's just subtle enough to not look like a costume. Justin called me a captain on the way into work, and he was the only one who commented on it...not sure what that says or doesn't say, but hey, who cares, right? It was the journey not the destination!
 PS. You caught me in my office bathroom taking photos of my "new" cardi. Hope you don't mind ;)
 Wednesday, November 10, 2010
Pumpkin Carving DDIY (Don't Do It Yourself!)
 Classy. Elegant. Dreamy. Well, unfortunately, my guy didn't turn out so well. He started out with the perfect shape. Sort of leaning back with a large surface area on the front to play around with. He had a great true pumpkin color (not that light orange some of the new ones have). But because the flesh was super thick, it was difficult to get the look I was going for. Not only was it hard to carve through him (the little saws I bought were too short and the knife I had was too thick), when I tried to scrape out some of the flesh to make my leaf, it just looked ridiculous. The amount of flesh that I'd have to remove to have any light shine through made it look like the opposite of a potato stamp, which just looks silly. Frankly, I'm embarrassed and don't want to show it. I'm semi-pouting over here ;)
On a brighter note, I had great success with my pumpkin seeds. They came out quite easily, AND I figured out how to clean them off pretty quickly. I think I saw a sieve in a picture on Young House Love during their pumpkin carving post. I wasn't quite sure why, but I thought I'd give it a go. Low and behold: Genius!
The hardest part about getting the seeds ready to eat is how to get those slimy orange strings off them. By pouring water over them in the strainer, I was able to clean off the gunk with little effort. The strings stuck to the mesh and did most of the work for me. I will definitely be using this method again next year.
 As for cooking them, I just shimmied them out onto a foil-covered cookie sheet, sprinkled them with some EVOO, salt, and half with Old Bay.
  I threw them under the broiler for about 10 minutes, and WHA-la! I love that nutty smell! MMM. Can't wait to go home and munch on these guys.
 And here, friends, is the single easiest thing that I did all fall, which also turned out to be one of my faves:
 I bought the twig and berries at Michael's for under $2 in mid-October. I think it was a getting-close-t0-Halloween sale, but I saw the potential to show this off for much longer than that! This baby will be sitting on my entry pony wall through Thanksgiving. She just screams effortless decor to me. What do you think?
 Tuesday, November 9, 2010
Holiday DIY Inspiration
The solution: Start planning NOW for Christmas decor. My parents will be in town and I'd love to have the house full of yule and cheer (or whatever it is they say) ;) In that vein, here are a few things that I'm LUERVING right now that I think might make the cut for the dual-holiday decor.
Gilded Log Centerpiece by Eddie Ross in Women's Day:

 Fuzzy Christmas Stockings at Pier 1 (I need to find a DIY for these babies!):

I hope to make one or a few of these projects in the upcoming days. I want to get on that Thanks Glass ASAP so I can convince my boyfriend to play along ;) However, I think that we might discuss ours throughout the month as table discussion during dinner rather than waiting until the end of the month. We'll see! I do look forward to using this with my kids off in the distant future. (No plans for kids now!)
Sunday, November 7, 2010
Final Halloween Showdown: DIY Decor
 I got the idea from Young House Love's Halloween video. It's a little blurry, since I'm still working off my cell phone camera, but I thought I'd share it with you all before I take it down. (I just brought up the Halloween bin, so I figured it's now or never.)
I'll start from the top:
1. We had this ghoul on a stick thing for our front yard from a few years ago. Unfortunately, the stick broke (oh college kids), so all we had left was this broken man...I hung him up on our coat hook and love the way his hand sort of falls over the front of the mirror.
2. I changed my white candles for orange ones in my lanterns (purchased two years ago from Kohl's).
3. The top left square has a wooden skeleton that Justin and I found in our new garage two years ago. Pretty scary to just come across in your new house, but it's working quite well as a strong Halloween piece. In front of him is a glass box I received last year for Christmas from my boss's boss. It had chocolates in it, but we've long finished those. I hung onto the box and put in it a few bones from another old Halloween piece. It was a foam grave stone with little bones, but I didn't feel like decorating the front yard this year. It turned out to be a good idea, since Justin and I went to Big Bear, Calif. this Halloween weekend. We pretty much missed the whole holiday, which was sort of nice ;)
OK, back to the decor.
4. The top right square is a stack of black and red books that I already had. They have nice spooky titles to boot.
5. The middle square has a framed photo that I moved from the bookshelf. It's from a trip I took to Costa Rica in grad school: an angel leaning over a grave with her finger shhhhing passersby. I love it! There's also a black leaf from the afore-mentioned gravestone decor from years past. It's leaning up against the frame for a little extra spooky umph.
6. In the bottom left square is a single yellow flower in a clear bud vase.
7. Finally, in the bottom right square are my clear jars that I found at a local antique store. They're filled with wine corks. It's not exactly spooky, but I thought it fit with the whole old and used theme.
Hooray! I've shared my last Halloween thoughts with you for 2010! What I learned so far is that I need to start thinking about the next holiday a lot earlier than I did for Halloween. I don't think that I should get my Christmas decor up before Thanksgiving. Oh, heck no. I want to enjoy the moment while I'm in it, but also get some planning going so that I can hit the ground running, as they say.
By the time I really got into the swing of Halloween decor this year, I had only like two days left before the holiday! No bueno. So what that means is: 1. Finish my fall decor now (i.e. carve my pumpkin. I know, I know, but I think it will work with my fall plans), and 2. Start planning NOW for Christmas decor. My parents are coming into town for Christmas, so this year is going to be AMAZE-Balls (as Justin says).
Happy Belated Halloween and be safe when you "fall back!"
Tuesday, November 2, 2010
Pepper Project Banner
S'more Smorbrod, Please!

In Denmark, they make smorbrod (pronounced s'more brawd)--little toasts covered in all sorts of different goodies--for dinner. I believe it's the Scandinavian version of the Spanish tapas. It's also the Pepper version of fast food ;) So with a grumbling tummy and tired feet, I went at it with some leftover bread from the book club, three Roma tomatoes, 1 clove of garlic, a few leaves fresh basil, EVOO, leftover feta cheese block also from the book club, Devil's food in a can, and Miracle Whip.
 While the bread toasted under the broiler, I mixed up some bruschetta and Devil's food--canned minced meat. I topped these suckers once the bread was golden brown and sat down to a quickie meal. ;) I would have been 100% happy with this project if I'd had one more topping option. I would have loved to try a chili cheese dog smorbrod with leftover chili, cheese, onions, and mini weenies (from book club Halloweenies). But the chili was bad, so I had to use the Devil's food on two out of the three toasts. I also thought tuna would have been nice, but I didn't want to open a brand new jar just for me. Maybe next time, I'll be more creative with what I find in the fridge, but for now, I'm happy with this quick dinner trick. Leftovers + bread = dinnertime in no time!
PS. In the book club post, I mentioned this bottle of Twisted Cabernet Sauvingnon. Here it is at the cabin we were visiting over the weekend. It matched perfectly with the Halloween decor...just like it did at the book club. This baby is just BEGGING to be opened and enjoyed!

Wednesday, October 27, 2010
Book Club Recap

Isn't it so cute?! Suzie made these Halloween fun-fetti cupcakes with spider web icing and plucked plastic spider rings from her condo decor as the "cherry" on top. I think she used white icing out of a jar and then made concentric circles with black piping. She took a tooth pick to drag the lines through the circles, stuck the spiders in, and wha la! They were just as delicious as they were cute!
I followed about 75% of my inspiration board for the party, seen here. I made a burlap-esque table runner out of extra fabric I had from a curtain I'd made a while ago. This was a great base, and I think it will work really well with other table-scapes in the future (uber excited about that tidbit!). I placed my white elevated tray on the center of the table runner, topped with a hurricane filled with bright-red apples and a black grosgrain ribbon tied around the neck. Then I put my two tin baskets that I received for last year's Easter basket on either side of the white tray. I placed two off-white candles in these tin baskets for extra glow. (I LOVED the look of the tin against the burlap. This combo made sure that the decor didn't go too far on either side of the modern vs. natural scale.)
Finally, I placed my batty napkin rings (with napkins) in the center of each square bowl, silverware, and glasses for water and wine at each place setting, and I was good to go! Once I wash my table runner (it got some of Bree's yummy spinach and artichoke dip on it), I'll recreate the tabletop to show you guys what it really looked like.
BOO-k Club Dinner Party Menu (wish I'd thought of that BOO part earlier):
Baked Feta appetizer from Sam the Cooking Guy: A little bland, so I'd suggest serving it with hummus and maybe don't get the low-fat kind like I did for a bit more shazaam! However, after reading the recipe again, I noticed I forgot the garlic. Could have been the clincher. "Recipe" here.
Curry Pumpkin Soup from Sam the Cooking Guy: VERY yummy, although I doubled the recipe which made it harder to keep warm without boiling. Also, by the time my last guest arrived, it had reduced to the consistency of pumpkin pie for her...oh well! Still tasty haha. Recipe here.
Salad with apples, feta, and tomatoes by Nissa: DE-LISH! Recipe self-explanatory.
Hallo-weenies by Suzie from Pillsbury: She made the tiny weenies which were delicious, but a little too small to picture the zombie-croissant-roll covering. She even brought tiny black bowls for the ketsup and mustard dip 'cause she's good like that! Recipe here.
Spinach and Artichoke Dip in a Bread Bowl by Bree: Again, I had a hard time getting this guy warm, but it was still delicious. She wasn't into it, which was ironic since she brought it, but everyone else was in leurve. MMMM...anything in a bread bowl is genius in my eyes.
Spider-Web Cupcakes by Suzie: I think I pumped these up enough already ;) Recipe on back of cupcake mix box.
Water and red, red wine. I found a cheap bottle of Cab with a black twisted tree on the front of it. It went perfectly with my theme, so I placed that on top of the library's copy of The Strain at the end of the table for added effect. Although, I was the only one who read the book, so I'm not even sure anyone recognized it ;)
Next book: The Help by Katharine Stockett (apparently we're into the two-word titles).
'Til next time, bookies!
Monday, October 25, 2010
There's a Little (Pumpkin) Fashionista in Us All: DIY
 Apparently, they were showcased at a Michael Kors show. Too cute! And too easy to make: 1. Cut out sunglasses and lips from a fashion magazine (honestly, this was the ONLY challenge of this DIY project because my mags didn't have photos large enough for such big glasses), 2. Match the glasses with the lips, I went for one big and one little (i.e. big sunglasses with little lips or little sunglasses with big lips)...you do what you like!
  3. Match the sunglass/lips duo with the right white pumpkin (I love the pudgy look of the top left pumpkin, which wouldn't have been possible with a flatter shape. Also, my pumpkins are much fatter than the ones from Sweet Paul. I wonder if my local pumpkin "patch" supports veggies on steroids...)
 4. Glue paper to pumpkins with any house-hold glue and get your fashion show started! I'm using this threesome for my coffee table centerpiece. I had thought about making one per dinner guest at my book club dinner tonight, but thought that six little white pumpkins might be a bit too much. Plus, with my batty napkin rings, there'd be a whole lot of Halloween tchotchkis going on for each place setting. I think these ladies are much happier in front of the TV anyway ;)
 Halloween is just around the corner! I hope you enjoy making this little $6 craft (each pumpkin was $2)...I did!
Friday, October 22, 2010
Leaf Votive Holder DIY
This is what I started with:
 Two mason jars (left over from an adventure with homemade orange jam), twine, and said leaf centerpiece. I chose this one so I could reuse the attached berries and pine cones for Christmas DIY TBD next month. Once I removed all of the leaves, berries, and pine cones from the "wreath," I was left with this:
 The leaves came out in pairs, so I cut them apart and tried to lay them out on the jar to attach with twine. However, those slippery little suckers just kept moving from where I placed them. So I came up with this plan: circle the jar with floral wire, stuff stems under wire in a nice overlapping pattern, and then tie the twine around the center of the leaves. Once I got all of the leaves where I wanted them, I removed the twine and was left with something quite nice!
 What do you think? MUCH better than the lace in my opinion. And the three-step process (as opposed to the original two-step process I initially tried) worked pretty well. This will allow me to remove all of the leaves after Halloween and reuse the jars for something else. Plus, I'll have the individual leaves for something else next year. I'm a big fan of reusing, but not replicating exactly.
Added bonus: This project helped me see that I need to level out my painting and work on my photo-taking skills ;)