I know, I know. You're thinking: Stick with one blog already. Well, this is the last time I'm moving. There have been a lot of changes in my life recently, and I really need a fresh, clean start. And so now that I'm emotionally back in a place where I'd like to share my thoughts with the blogosphere, I figured I'd get myself a clean slate and clear mind.
My new blog--Mission Moi--is located just "around the corner." You'll find it easily through this link: http://missionmoi.blogspot.com. I'm pretty sure the only folks who read this regularly are my mom and sister, so if anyone else wants to come along for the ride then please find us there. I'll explain the name when we get "home."
As this will be my last post from Pepper Projects, I'd like to take the time now to just lock the doors with one last look around the room. Thanks for the memories, Pepper. I'll hold them close.
Love,
Stephanie

Wednesday, February 2, 2011
Monday, December 20, 2010
Project: Get Blogger to Go WYSIWYG
Why is Google's blogger not what you see is what you get (WYSIWYG)? I'd love to have my blog look just like what I type into my "compose" section. So. Frustrating. Any help?
Crate & Barrel DIY Inspiration Bonanza
I'm sure Crate and Barrel didn't intend to inspire me in their newest catalogue. However, I can't help but see a ton of items BEGGING for a good old fashioned DIY.

Here's the link to the Holiday Gift Guide catalogue. Unfortunately, I can't save each individual item to show you. I can, though, give you a virtual tour through my DIY thought process. (Is this lame or clever? You be the judge.)
1. Cover page has some great ideas for gift wrapping. Take even an old tin can--I think it's safe to say that we all have one or two old popcorn tins laying around--and decorate with construction paper and rubber cement. Or Or (Side note: does anyone love "So I Married an Axe Murderer" as much as I do? or reference it as often in every day life?)...I love the idea of buying one sheet of holiday-themed scrapbook paper and cutting it into strips to wrap around small, festive-colored boxes.
2. Page 2. This is super simple, but I love the idea of using white and red sugar or sprinkles to fill the bottom of a white cake stand. Put some yummy cookies or cupcakes on the colored "snow" and off you go!
3. The mittens on page 3 want to make me reread that book about all the forest animals who find shelter in the lost mitten. Oooh. Gee. Boo. Mittens who've lost their mate or one's you've found on the cheap at thrift stores would be too easy to fill with biscotti, chocolate-covered peppermint sticks, candy canes, rock sugar sticks. You name it! Make them or just assemble them at home for an adorably small yet thoughtful gift.
Another side note: I just want to cover those puppies on page 9 in kisses!
4. I think that you could make a plant in a box just like on page 10. Maybe get a wicker or ceramic box, fill with soil and some cute seeds, wrap a bow with a picture of the adult version of your little seedling and some how-to care instructions, and you have a gift that keeps on giving!
5. Page 11's fire starters look super easy to recreate. In fact, design*sponge has done the homework for you here!
6. You could easily find unusual ways to hang your ornaments around the house this year. Create a mobile with wire hangers, maybe? And that cookie tree (also on page 13) looks like it would be easy to stack up against ;)
7. Pillow. Stage left. Page 14. Done and done. Follow a post like this one from Bliss Bloom Blog and you can do this type of felt project anywhere! On a fabric pillow, I'd suggest gluing the "leaves" so you don't have to put your heads on pins and needles...literally.
8. I've been seeing a lot of these gathered ornaments (like on page 16) pop up this holiday season. I love them hung from a chandelier!
9. I'm pretty sure I could whip up some fake-me-out leather coasters with matching snap holder like the ones on page 18 in a SNAP! Pun intended :) You could even make them in felt, if you so choose. They have this great textured felt nowadays, and I've been dying to find a project that fits them. (Something about felt really does it for me this season. New low.) I think this is that perfect project!
10. Although it looks like it would be really hard to make a twig candle holder like on page 22, I think you could get the same sentiment with a twig and a few tea lights scattered nearby. And the price is just right.
11. Page 30 has an adorable snowman plate that you could certainly custom make on your own. Buy a glass plate, glass paint, and go to town on the BACK SIDE of the plate. Make sure to follow directions on how to seal the paint so you can hand wash the top after Santa has eaten all of his cookies. And also make sure that you start from the front of the snowman (or whatever you choose to paint) and work your way back. Paint the nose, eyes, and buttons first so that when you paint over them with the white snow body you can still see these tiny details from the front of the plate. Make sense?
12. I love this bag of "coal" on page 31. I may just have to run out and buy it for my dad, who loves licorice. However, if you want to make it yourself, sew a quick drawstring bag, attach felt letters, and cut up some black licorice. Easy peasy lemon squeezy.
13. Love the aprons on page 33. Think of all the options you have to make: snowman, Christmas tree, ornament, Mrs. Claus, elf. I'd recommend some heavy-duty fabric that can withstand a little water and butter action, but besides that, I think they'd look great with eyeballed measurements.
14. I'm exhausted. SO MANY IDEAS! I think pages 34 and 35 have a few great ornament ideas, but I just can't put the words together. Anyone have any suggestions? ;)
15. I know this isn't what C&B was thinking with the tin on page 53, but wouldn't it be such a cute idea to paint a checkerboard on the top of a tin and then fill it with checker pieces as a to-go game? The paint would be easy to find at a craft store and you could either make the pieces or get them and the tin at a thrift store for cheap. I'm thinking my seasonal obsession just switched from felt to tin. What do you think?
Thursday, December 16, 2010
Project: Work Holiday Party Outfit
The department who I consult for is holding their holiday party today at the end of the day. We were supposed to have a scavenger hunt, don holiday hats, wear a holiday sweater, etc. Ugh. I love this season and was really excited for this holiday party, but trying to figure out how to dress appropriately for work and a holiday happy hour, accommodate for getting in and out of a car for the scavenger hunt, wear a holiday-themed sweater and hat, and avoid jeans (government client) was SUPER overwhelming. It was a slight nightmare. So, to J's Everyday Fashion Blog I went for inspiration and advice!
If you're unfamiliar with this blog and her very interactive Facebook page, shame on you! I'm just kidding. You're just really missing out on a great resource for work-life and personal-life outfit inspiration. It's hard to get motivated to look nice at 7am every morning, and J gives you a head start to getting it right! Well...at least I HOPE I'm getting it right. ;)
Anyway, so after getting some advice from J, I came up with this inspired outfit. I figured the skirt was great for our San Diego weather (haha on me. It's raining today); the sweater (which I DIY'd last year from this Glamourai post) was a holiday grass green that the picture doesn't show; and my borrowed hat will make party time oh so jolly. (Can you feel my holiday spirit?) The skirt has a silk stripe down the middle, the outfit is comfy for the long day, and the shoes are accessorized just enough to make me happy. Care to share any holiday outfit mishaps or magical moments? Picture courtesy of me. Please excuse the blurriness...it's from my Skype camera, which is the only thing that would work at work. Also, don't you just love how I'm posing with my bike? ;) The only other option would be to throw it in the hallway and just ask my coworkers to watch it while I take some photos for my blog. Oh, I'd love to see how THAT goes over. Incognito it is!
If you're unfamiliar with this blog and her very interactive Facebook page, shame on you! I'm just kidding. You're just really missing out on a great resource for work-life and personal-life outfit inspiration. It's hard to get motivated to look nice at 7am every morning, and J gives you a head start to getting it right! Well...at least I HOPE I'm getting it right. ;)
Anyway, so after getting some advice from J, I came up with this inspired outfit. I figured the skirt was great for our San Diego weather (haha on me. It's raining today); the sweater (which I DIY'd last year from this Glamourai post) was a holiday grass green that the picture doesn't show; and my borrowed hat will make party time oh so jolly. (Can you feel my holiday spirit?) The skirt has a silk stripe down the middle, the outfit is comfy for the long day, and the shoes are accessorized just enough to make me happy. Care to share any holiday outfit mishaps or magical moments?
 Picture courtesy of me. Please excuse the blurriness...it's from my Skype camera, which is the only thing that would work at work. Also, don't you just love how I'm posing with my bike? ;) The only other option would be to throw it in the hallway and just ask my coworkers to watch it while I take some photos for my blog. Oh, I'd love to see how THAT goes over. Incognito it is!
Wednesday, December 15, 2010
Project: Organize My DIY Life!
I am so unbelievably overwhelmed right now with the amount of projects that I want to start. With Christmas coming at me like a freight train and very little presents to show for it, I'm not sure how to manage my desires and reality. Ay chi mama!
Since my parents are coming into town Christmas Eve, I need to have their presents ready and wrapped ASAP. And my sister and her family (Lou and the baby girls) should have their presents mailed before Christmas so they can have them to open. That needs to be done BEFORE my parents stuff. Ahh, I just don't know where to start!
So in true family fashion, I will just pretend like I don't have any problems and avoid thinking about Christmas presents almost entirely...until it's so dire that I have to get them all at once. It's a family thing :)
In the meantime, I'm crushing on a few DIY projects and a few things that I think I can DIY:
- Ribbon Necklace by collegefashion.net


- Carrot Cake Cupcakes by Hungry-Girl.com

- Snow Drift Candle Holders by Living with Lindsay

- Multi-Chain and Ribbon Necklace by She's Crafty

- Ribbon Bangle from American Eagle (I think a DIY would be super easy to make this guy.)
- "JOY" Bunting like this one from Joyful Joyful's Etsy shop.

- Fluffy Earmuffs by Mightymannie (I hope to make these for my mom with the leftovers from my stocking project that I STILL haven't done.)
And of course all of my holiday inspiration items. Man, what I wouldn't do to have crafting be my full-time job. Any suggestions on how to get organized during the Christmas season?
Photos courtesy of collegefashion.net, hungry-girl.com, livingwithlindsay.com, missonmimedia.com, and Joyful Joyful.
Monday, December 13, 2010
December in San Diego
Not to rub it in, but look what I found today in sunny San Diego...

Happy December!
Thursday, December 9, 2010
Project: Puff Ball Garland DIY
If you'll remember, at the beginning of my Christmas decor search I was inspired by this garland that was shown on Bower Power. I love how cushy it looks without looking like I made it in kindergarten (although my mom still has my Corduroy ornament from preschool, so something should be said in favor of old school home-made items). So, Tuesday night I decided to give it a try! Here's my Puff Ball Garland DIY:
1. Choose your color scheme for the garland. I went with red, white, and black although I was looking for gray. Justin, it seems, would have been just as happy with the traditional red and green, but I wanted something a little different. You'll need different sized and colored puff balls, needle and thread, and scissors. That's it!
 2. While watching holiday movie (this is just a suggestion ;) ), play around with the sequence of the puff balls until you've decided on a pattern you like. I think I prefer the one on the top, but was afraid I wouldn't have enough of the red and white balls...turns out, they shorted me some black balls.
 3. Cut a piece of thread as long as you think you can handle it. I ended up cutting about four 3/4 yard-long pieces once all was said and done, although I cut each piece as need be. Tie a knot at the end of your thread. String the balls on in your pre-selected order trying to get the thread as close to the middle of the puff ball as you can. (You can feel that it's a little harder to pierce the exact center of the puff ball since it's much more dense in that area. Try to get the needle through there if you can; you don't want your balls falling off!) Don't force the balls on top of each other. They'll squish together if you push too hard, and you don't want crowded or scrunched balls.
 4. Once you've gotten to where you have about three or four inches of thread remaining, tie a knot as close to the end of your last puff ball as you can without pushing the balls back on top of each other. Cut your next piece of thread and tie it on as best as you can. I ended up sewing my new thread through the knot on the end of the first string and then tying a new knot on top of the old one to make sure they're connected.
 5. Continue on your merry way until all your balls have been used. Tie off the last string as in step four. Trim the loose ends and WHA-la!
 I have to say, I was really pleasantly surprised with how easy it was to make this and how nice my ball garland looks dangling on my rod. Justin said "it could even work year round," so there's always that ;)
This post inspired by AC/DC's "Big Balls."
1. Choose your color scheme for the garland. I went with red, white, and black although I was looking for gray. Justin, it seems, would have been just as happy with the traditional red and green, but I wanted something a little different. You'll need different sized and colored puff balls, needle and thread, and scissors. That's it!
 2. While watching holiday movie (this is just a suggestion ;) ), play around with the sequence of the puff balls until you've decided on a pattern you like. I think I prefer the one on the top, but was afraid I wouldn't have enough of the red and white balls...turns out, they shorted me some black balls.
 3. Cut a piece of thread as long as you think you can handle it. I ended up cutting about four 3/4 yard-long pieces once all was said and done, although I cut each piece as need be. Tie a knot at the end of your thread. String the balls on in your pre-selected order trying to get the thread as close to the middle of the puff ball as you can. (You can feel that it's a little harder to pierce the exact center of the puff ball since it's much more dense in that area. Try to get the needle through there if you can; you don't want your balls falling off!) Don't force the balls on top of each other. They'll squish together if you push too hard, and you don't want crowded or scrunched balls.
 4. Once you've gotten to where you have about three or four inches of thread remaining, tie a knot as close to the end of your last puff ball as you can without pushing the balls back on top of each other. Cut your next piece of thread and tie it on as best as you can. I ended up sewing my new thread through the knot on the end of the first string and then tying a new knot on top of the old one to make sure they're connected.
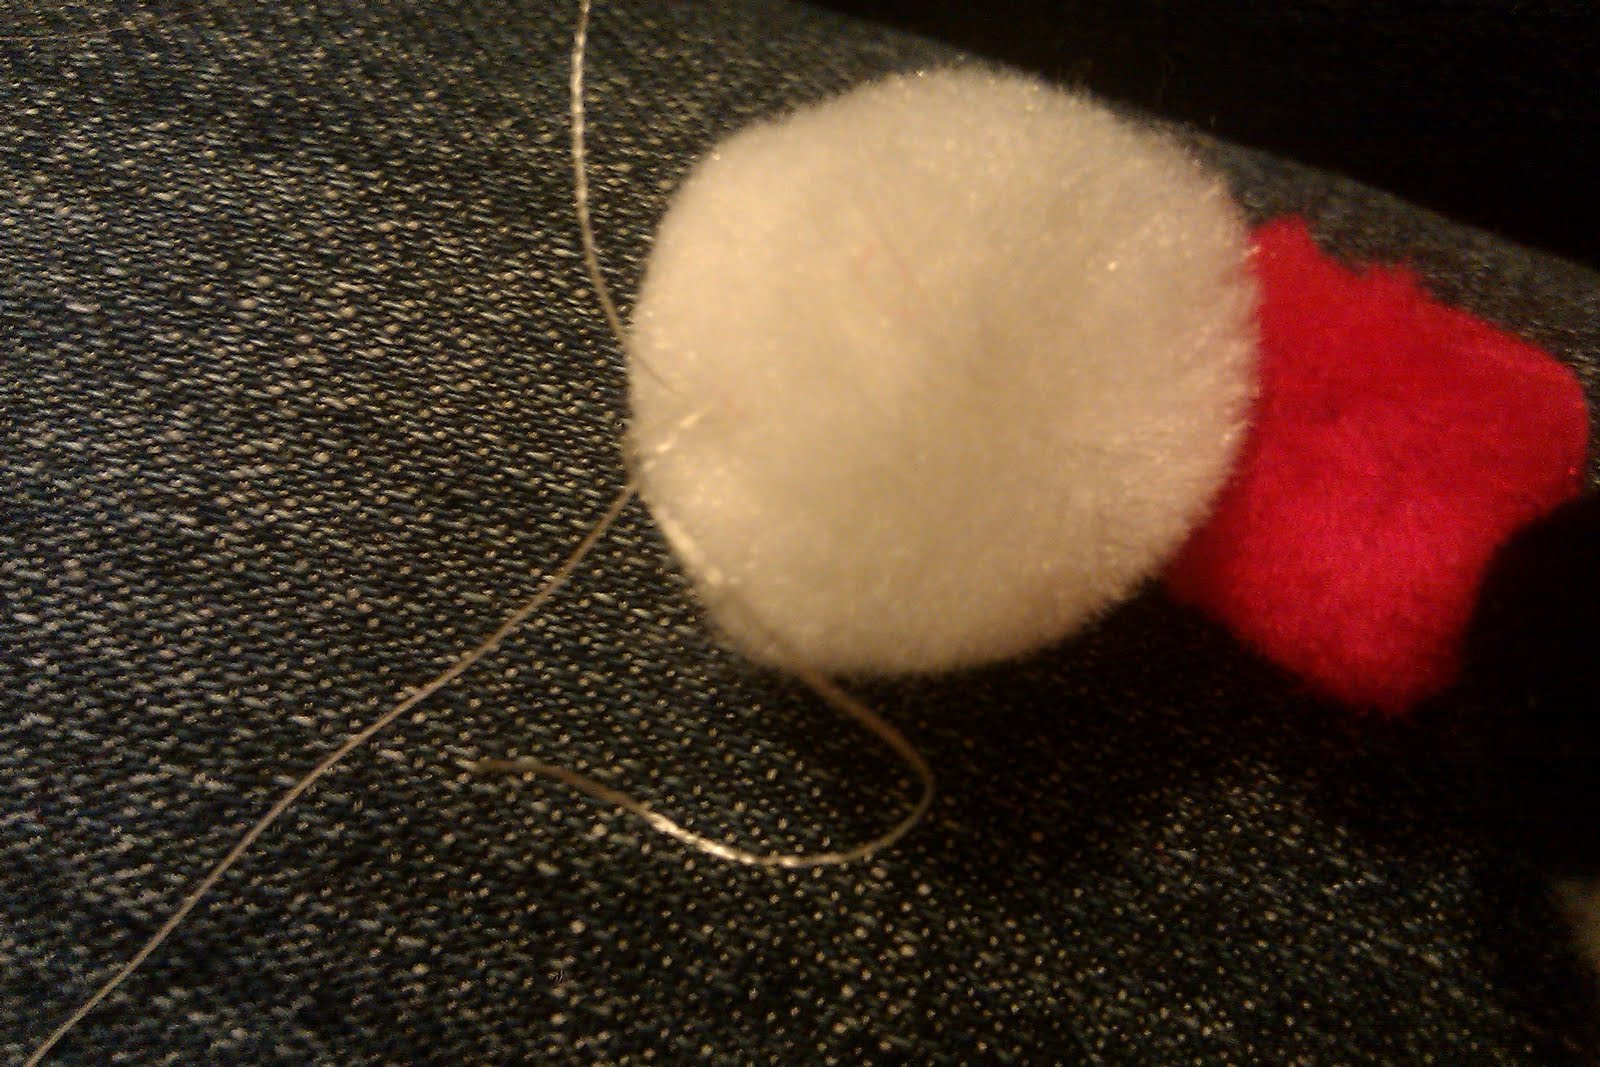 5. Continue on your merry way until all your balls have been used. Tie off the last string as in step four. Trim the loose ends and WHA-la!
 I have to say, I was really pleasantly surprised with how easy it was to make this and how nice my ball garland looks dangling on my rod. Justin said "it could even work year round," so there's always that ;)
This post inspired by AC/DC's "Big Balls."
Subscribe to:
Comments (Atom)